Advertisement
Why Saturation For Vanilla SHADER Is the Quickest Visual Upgrade for Minecraft

Saturation for Vanilla SHADER is a post-processing shader that boosts color vibrance in Minecraft without replacing the full graphics pipeline — making it one of the lightest ways to make your game look dramatically better.
Quick answer — here’s what you need to know:
- It works inside Minecraft’s built-in Fabulous graphics setting (no OptiFine required for Java)
- The key setting is the Vibrance uniform, adjustable from 0.0 (washed out) to 2.0 (very vivid), with 1.0 as default
- For Minecraft PE / Bedrock, saturation effects are applied via texture packs, not GLSL shaders
- Java Edition users configure saturation by editing a file called transparency.json
- Third-party clients offer a simpler Color Saturation slider if you want a no-file-editing option
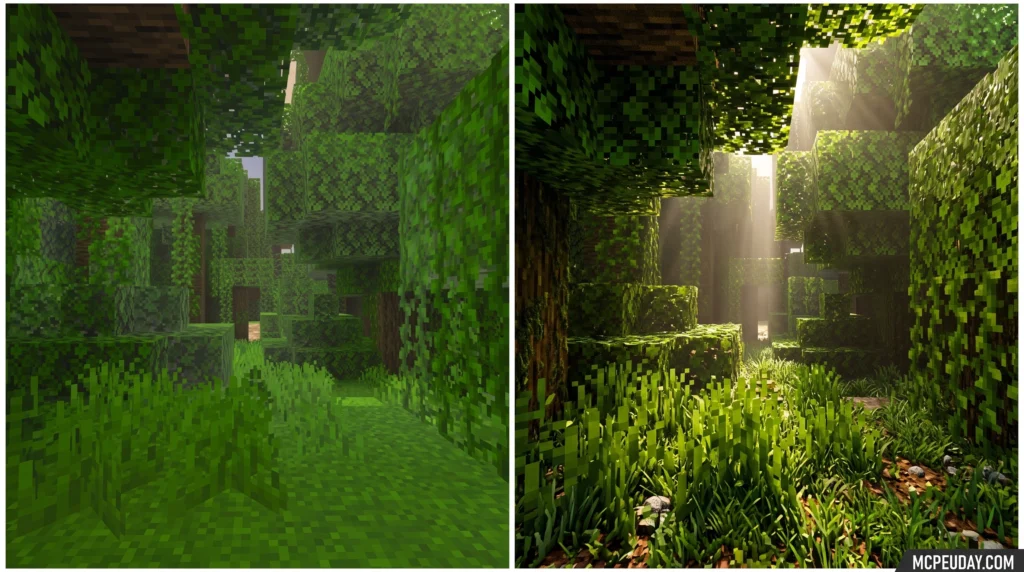
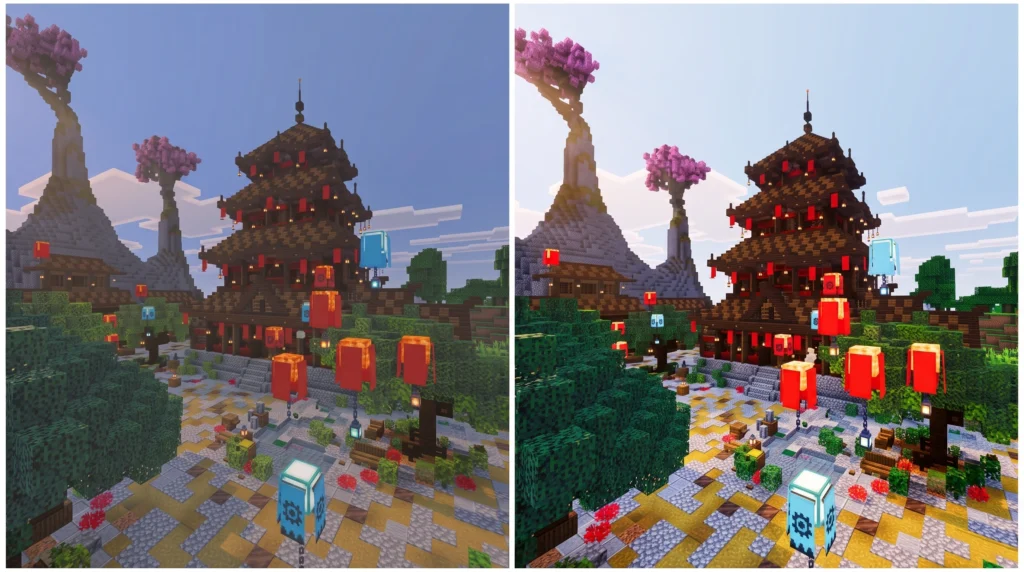
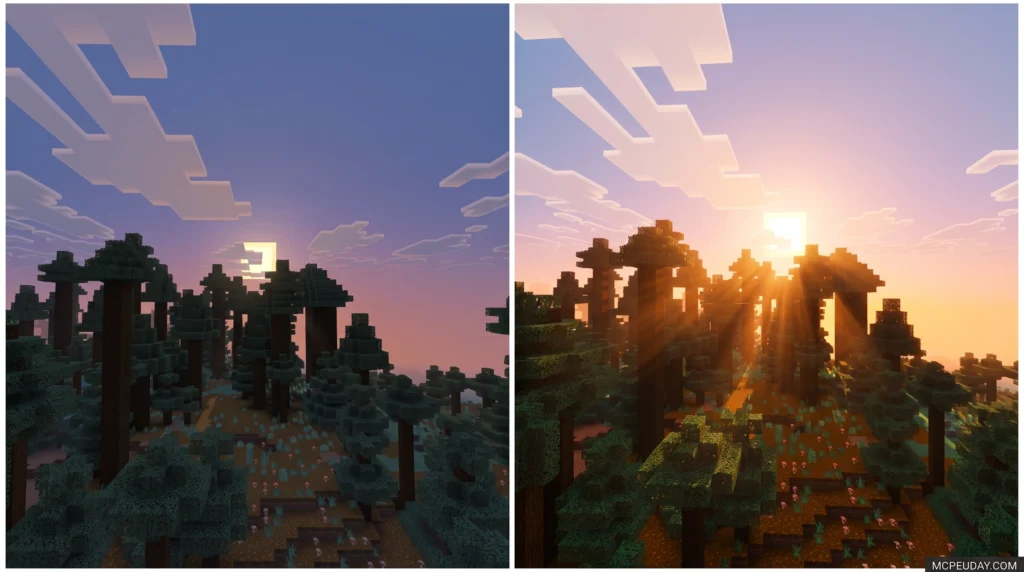
Minecraft’s default colors can look flat and dull, especially in darker biomes or during overcast weather. A saturation shader fixes that by pushing colors closer to what your eye expects to see — richer greens, deeper blues, warmer sunsets.
The good news? You don’t need a powerful PC or a complicated mod loader to get started.

What is the Saturation For Vanilla SHADER?
When we talk about the Saturation For Vanilla SHADER, we are referring to a specialized post-processing tool designed to enhance Minecraft’s built-in graphics. Instead of completely rewriting how the game renders lighting, shadows, and water like heavy shader packs do, this lightweight solution modifies the final image rendered on your screen.
It uses GLSL (OpenGL Shading Language) shaders to apply a real-time color enhancement layer. By intercepting the game’s default rendering pass, it recalculates the color values of every pixel. This results in a massive visual upgrade without the typical performance cost associated with traditional shaders. The primary goal is simple: preserve the beloved blocky aesthetic of vanilla Minecraft while injecting a healthy dose of warmth and color vibrance.
Key Features of the Saturation For Vanilla SHADER
The standout feature of this shader is its dedicated Vibrance setting. In the configuration files, this variable allows you to control the color balance and brightness of your world. If you prefer a subtle lift, you can keep it close to its default setting. If you want a fantasy-style world where the leaves practically glow, you can crank it up.
Other options often include mild bloom, auto-exposure, and basic contrast tuning. For players who want a straightforward, pre-configured option, the Simple Saturation Shader on Modrinth or the Simple Saturation Shader for Minecraft 1.21.5 – TLauncher offers a quick way to get these vibrant features up and running instantly.
How It Differs from Other Vanilla Shaders
Unlike complex shader packs that require external engines like OptiFine or Iris, the Saturation For Vanilla SHADER works directly within Minecraft’s native code structure. It utilizes the “Fabulous!” graphics setting introduced by Mojang, which utilizes a transparency pipeline to render layered translucent blocks and post-processing effects.
While community vanilla shaders like the famous bradleyq/mcvanillashaders project (which has garnered 280 stars on GitHub) build an entire suite of effects—including water waves, volumetric clouds, and screen-space reflections—into this vanilla pipeline, a dedicated saturation shader keeps things focused. It isolates the color-grading aspect so that players on low-end hardware don’t have to suffer frame drops just to enjoy a brighter world. You can find many of these projects hosted across popular community shader repositories or the official GitHub – bradleyq/mcvanillashaders at v2.3 · GitHub release.
How to Install and Configure Saturation Shaders
Getting these shaders running in your game is surprisingly easy, whether you play on Java Edition or Bedrock Edition (MCPE). Because we want to make the process as painless as possible, we have put together a comprehensive guide. For a complete step-by-step walkthrough on setting up your graphics, check out our How to Turn on Shaders in Minecraft 2026 Guide.
On Java Edition, you will typically download the shader pack as a resource pack, place it in your “resourcepacks” folder, and enable it in-game. On Bedrock, you will install it as an .mcpack file that activates a custom resource pack to bypass the platform’s shader limitations.
Configuring the Saturation For Vanilla SHADER in transparency.json

If you are using a vanilla-compatible shader pack like the one found in the bradleyq/mcvanillashaders repository, you can manually fine-tune your colors. This is done by opening the shader’s configuration files, specifically the transparency.json file.
Inside this file, you will find several configurable variables called uniforms. The most important one for our purposes is the Vibrance uniform. This value typically ranges from 0.0 (completely grayscale) to 2.0 (maximum saturation), with a default value of 1.0.
Under the hood, the mathematical approach to this saturation adjustment is quite elegant. As demonstrated in standard graphics code like the src/filters/filter-fragment-shader.glsl at master · GoogleChromeLabs/snapshot file, the shader calculates the luminance of each pixel using specific weights (0.299 for red, 0.587 for green, and 0.114 for blue). It then performs a linear interpolation between this grayscale value and the original color based on your custom vibrance setting.
You can also adjust other settings in this file, such as:
- BloomAmount: Controls the glow of bright light sources (typically set between 0.0 and 1.0).
- FOVGuess: Helps the shader calculate angles correctly based on your field of view.
- FogDistance: Adjusts how far away the vanilla fog starts to render.
For developers interested in how these pipelines are structured, resources like the DOCUMENTATION.md at master · Eldeston/Super-Duper-Vanilla and educational guides like 18-postprocessing-saturation.html at master · robertoranon/int3D provide excellent breakdowns of framebuffer structures and math principles behind 3D post-processing.
Optimizing Performance and Fabulous Graphics Settings
Because these vanilla shaders rely on Minecraft’s “Fabulous!” graphics setting, they require a slightly different optimization strategy than standard OptiFine shaders. To get the absolute best frame rates, we recommend setting your FOV to around 70 and keeping your render distance around 16 chunks.
If you find your computer struggling, lowering your render distance to 12 chunks will instantly restore your smooth gameplay. For Bedrock players looking for the ultimate balance between performance and beauty, be sure to read our curated list of the Best Shaders for MCPE 1.21.
Comparing Saturation Shaders vs. Texture Packs and Client Mods
When it comes to boosting your colors, you have three main paths: using a post-processing shader, installing a color-boosting texture pack, or using built-in client mods.

If you use custom launchers like Lunar Client, you might already have access to a built-in Color Saturation mod. This mod allows you to adjust color balance directly from an in-game menu using simple sliders without touching any json files. However, this is a client-side screen overlay, whereas a true GLSL shader integrates directly with the game’s lighting and world environment.
Let’s look at how these three methods compare:
| Feature | GLSL Saturation Shaders | Color Saturation Client Mods | Saturation Texture Packs |
|---|---|---|---|
| Performance Impact | Low to Medium | Extremely Low | Zero |
| Customization | High (Edit JSON files) | High (In-game sliders) | Low (Static textures) |
| Platform Compatibility | Primarily Java (Fabulous) | Java (Custom Clients) | Bedrock & Java |
| Requirement | Fabulous Graphics | Specific Client Mod | Any graphics setting |
For players who prefer a zero-performance-cost solution, texture packs like the ones hosted on the Saturation | Minecraft PE Texture Packs – MCPEDL page are incredible. These packs artificially boost the color saturation of the actual block textures, giving you a brighter world even on the lowest-end mobile devices.
Troubleshooting Common Shader Issues
While vanilla shaders are incredibly stable, they aren’t completely immune to bugs. Because they hook into the game’s transparency pipeline, you might occasionally experience translucent rendering issues (such as water looking invisible from certain angles) or minor lighting bugs when looking through glass.
Another known issue is “shadow jank,” where shadows might flicker slightly when you move your head rapidly. If you run into these issues and want a flawless, pre-optimized alternative that works beautifully out of the box, we highly recommend checking out our guide on the Newb X Unwind Shader for Low End Devices.
Frequently Asked Questions about Saturation Shaders
What is the default vibrance setting for vanilla shaders?
The default vibrance setting in most vanilla-based shaders is 1.0. This represents the standard color balance of the game. You can customize this value inside the configuration files anywhere from 0.0 (which turns your game black and white) up to 2.0 (which doubles the intensity of the colors).
Does the Saturation shader work on Minecraft PE (MCPE)?
Yes, but with a catch! True GLSL-based shader files designed for Java do not run on Bedrock’s modern Render Dragon engine. Instead, Bedrock players use specialized saturation texture packs. The Saturation texture pack on MCPEDL has over 152.2k downloads and is fully updated for versions 1.17 through 1.20+. For alternative high-vibrance options, take a look at our list of the Top 5 Best Realistic Shaders for MCPE.
Why does my game lag with Fabulous graphics enabled?
Fabulous graphics forces Minecraft to draw translucent blocks (like water, stained glass, and clouds) in separate layers before blending them together. This can be heavy on older graphics cards. If you want a vibrant game but can’t run Fabulous graphics smoothly, we suggest checking out our Newb X Supplementary Shader Guide for an incredibly stylish, FPS-friendly alternative.
Conclusion
Finding and configuring the right Saturation For Vanilla SHADER is one of the easiest, most satisfying ways to breathe new life into your Minecraft worlds. Whether you choose to edit your transparency.json file for custom color grading, use a simple client mod, or download a specialized Bedrock texture pack, the result is a warmer, more inviting game.
At MCPEUDAY, we are dedicated to bringing you the best, most up-to-date resources for your gaming adventures. Ready to take your graphics to the next level? Head over to our ultimate showcase of the Best Shaders for MCPE 1.21 and find your perfect visual match today!
Download
Download Shader
MORE SHADERS- Shaders – MCPEUDAY
Free with Minecraft Marketplace All Packs – Click and Join