Advertisement
What is Photon Shaders and Why Should You Use It?
The intro is already written, include it as is and ensure the rest of the article is consistent with the intro.

If you want to know how to install Photon Minecraft shader, here’s the short version:
- Install Iris (recommended) or OptiFine as your shader loader
- Download the Photon Shaders ZIP from Modrinth or GitHub
- Open your
.minecraft/shaderpacksfolder - Drop the ZIP file into that folder (no extraction needed)
- Launch Minecraft, go to Video Settings > Shader Packs, and select Photon
That’s it. Keep reading for the full step-by-step breakdown, performance tips, and fixes for common issues.
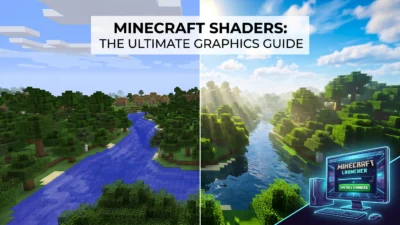
Minecraft can look completely different with the right shader — and photon minecraft shader how to install questions are some of the most searched topics in the Minecraft community right now. With over 16.88 million downloads on Modrinth, Photon has clearly earned its reputation.
What makes Photon stand out is its focus on actual gameplay. It’s not just built for screenshots. It adds realistic lighting, soft shadows, dynamic clouds, and reflective water — while staying smooth enough to actually play with.
Whether you’re on a mid-range PC or squeezing frames out of older hardware, this guide covers everything you need to get Photon running fast.

When you look at the crowded landscape of Minecraft shader packs, it is easy to get overwhelmed. Some packs aim for hyper-realistic path tracing that turns your graphics card into a space heater, while others are so lightweight they barely change the game’s look. Photon Shaders sits comfortably in the sweet spot. Created by developer sixthsurge, it is a gameplay-focused shader pack designed to deliver a semi-realistic, stunning aesthetic without completely destroying your frame rate.
One of Photon’s greatest strengths is that it achieves gorgeous visuals without relying on heavy ray-tracing pipelines. Instead, it uses smart rendering techniques to mimic natural light behaviors. For players searching for the perfect balance of visual fidelity and smooth performance, Photon is often the ultimate answer. If you are curious about how it stacks up against other high-end visual mods, you can read our breakdown of the 3 Best Shaders for Minecraft 1.21 Ultra Realistic Smooth FPS Stunning Graphics.
What truly sets Photon apart from its competitors is its atmospheric depth. It features a fully dynamic weather system, volumetric fog that rolls realistically through valleys, and screen-space reflections that make wet blocks and water bodies look incredibly lifelike. Additionally, it offers built-in support for labPBR materials, meaning if you pair it with a compatible high-resolution resource pack, blocks will have realistic physical textures, depth, and light-reflecting properties.
For those playing on slightly older hardware, Photon features advanced temporal upscaling. This technology renders the game at a lower internal resolution and uses temporal data to upscale it to your native screen resolution, giving you a massive performance boost with minimal loss in visual quality.
Key Features of Photon Shaders
If you are still on the fence about whether to go through the photon minecraft shader how to install process, let’s look at some of its standout features:
- Atmosphere & Dynamic Sky: Photon features an incredible sky model with multiple layers of dynamic clouds that shift and change based on the time of day and current in-game weather. Sunset and sunrise gradients are smooth and breathtakingly natural.
- Water Reflections & Physics: Water is not just a flat blue texture anymore. Photon adds gentle, wind-driven ripples, underwater fog, realistic refraction, and screen-space reflections that mirror the surrounding landscape.
- Voxel-Based Colored Lighting: This is the crown jewel of the pack. When light passes through stained glass, it actually casts colored light onto the surrounding blocks. If you place a redstone torch in a dark cave, it emits a warm, moody red glow. Note: This advanced feature requires the Iris shader loader and the “Ultra” shader profile.
- Volumetric Fog & Soft Shadows: Fog settles in low-elevation areas and reacts dynamically to light sources, creating beautiful sunbeams (god rays) filtering through trees. Shadows are soft around the edges, mimicking how light behaves in the real world.
- Camera Effects: Includes high-quality bloom, depth of field, and optional motion blur. The bloom downsampling method is actually inspired by techniques used in AAA titles like Call of Duty: Advanced Warfare, ensuring a incredibly clean, cinematic glow.
If you are interested in looking under the hood of how these features are coded, you can check out the official sixthsurge/photon GitHub repository, which boasts over 1,700 stars and is written almost entirely in GLSL.
Supported Minecraft Versions and Shader Loaders
One common worry among players is version compatibility. Fortunately, shader packs are generally not highly dependent on specific Minecraft versions. As long as your shader loader (like Iris or OptiFine) is updated and running on your game, Photon should work perfectly.
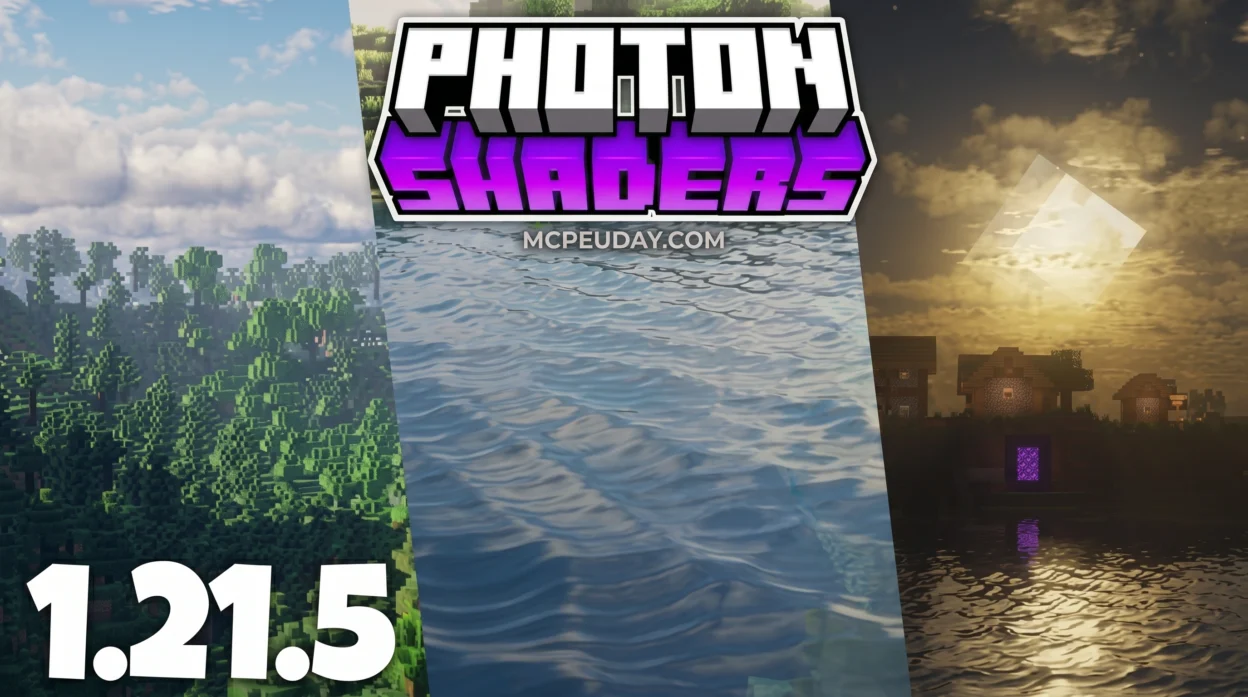
Officially, Photon Shaders supports Minecraft versions from 1.16.5 all the way through 1.21.x and beyond.
While the shader pack is technically compatible with both Iris and OptiFine, we highly recommend using Iris. Iris provides significantly better performance, superior mod compatibility, and is required to run advanced features like voxel-based colored lighting. If you want to read the official technical specifications and compatibility notes directly from the source, take a look at the README.md at 9b651b1cc90701d48bc86a663a852aa04744bbc5 · sixthsurge/photon.
Photon Minecraft Shader How to Install: Step-by-Step Guide
Now that you know why Photon is an absolute must-have, let’s get into the step-by-step installation process. We have broken this down into five simple, foolproof steps so you can get up and running in minutes. If you prefer a visual walkthrough alongside this guide, you can watch this helpful video tutorial on How to Download & Install PHOTON Shaders in Minecraft 1.21.5.
Before we begin, make sure you have launched Minecraft at least once on the version you want to play. This ensures that all necessary game directories and local files have been generated on your computer.

Step 1: Download and Install Iris or OptiFine
To run any shader pack in Minecraft Java Edition, you need a mod called a “shader loader.” You have two main choices: Iris or OptiFine.
We strongly recommend Iris combined with Sodium. Sodium is a modern rendering engine replacement that dramatically increases your FPS, and Iris is built from the ground up to work perfectly alongside it.
- Go to the official Iris website and download the universal Iris Installer.
- Run the downloaded installer file.
- Select your desired Minecraft version (e.g., 1.21.x) and choose the “Iris on Fabric” install type.
- Click Install. The installer will automatically download Iris, Sodium, and the Fabric mod loader, creating a ready-to-play profile in your Minecraft Launcher.
If you prefer using OptiFine, go to the official OptiFine website, download the installer for your corresponding Minecraft version, and run it to create an OptiFine profile.
Step 2: Get the Official Photon Shader Files
With your shader loader installed, it is time to grab the actual shader pack. To ensure you are downloading a safe, virus-free file, always get it from official sources.
You can download the latest stable release from the Photon Shaders – Minecraft Shader page on Modrinth.
Simply click the download button for the version that matches your game setup. Save the resulting .zip file to an easily accessible location, like your Desktop or Downloads folder. Do not extract or unzip this file! Minecraft reads shader packs directly from their zipped archives.
Step 3: Locate Your Minecraft Shaderpacks Folder
Next, we need to place the downloaded ZIP file into the directory where Minecraft looks for shader packs. This folder is called shaderpacks.
Here is how to find it depending on your operating system:
- Windows: Press the
Windows Key + Ron your keyboard to open the Run dialog box. Type%appdata%\.minecraftand hit Enter. This will open your main Minecraft directory. Look for a folder namedshaderpacks. - macOS: Open Finder. Click “Go” in the top menu bar, hold down the
Optionkey, and click “Library”. Navigate toApplication Support>minecraft>shaderpacks. - Linux: Your directory is typically located at
~/.minecraft/shaderpacks.
Tip: If you do not see a folder named shaderpacks inside your main Minecraft directory, simply right-click, create a new folder, and name it exactly shaderpacks (all lowercase).
Step 4: Move the Photon ZIP File
Now, take the photon-shader.zip file you downloaded in Step 2 and drag and drop it directly into the shaderpacks folder you located in Step 3.
Again, make sure you do not extract the contents of the ZIP. It should sit in the folder as a single compressed file.
Step 5: Activate the Shader In-Game
You are almost ready to play! Now we just need to tell Minecraft to turn the shader on.
- Open your Minecraft Launcher and select the Iris (or OptiFine) profile you created in Step 1.
- Click Play to launch the game.
- Once you reach the main menu, go to Options > Video Settings.
- If you are using Iris, click on the Shader Packs tab. (If you are using OptiFine, go to Video Settings > Shaders).
- You should see “Photon” listed in the menu. Click on it to select it.
- Click Apply or Done.
Load up your favorite single-player world or join a server, and prepare to be amazed by the incredible graphic transformation!

Best Settings for Low-End PCs and Performance Optimization
While Photon Shaders is incredibly well-optimized, running any shader pack will impact your frame rate. If you are playing on a budget laptop, a system with integrated graphics, or just want to squeeze out every single frame for competitive play, tweaking your settings is essential.
To help you find the perfect balance, we have put together a quick-reference table comparing the best settings for low-end “potato” PCs versus high-end cinematic setups:
| Setting Category | Low-End / Max FPS Profile | High-End / Cinematic Profile |
|---|---|---|
| Shader Profile Preset | Low or Medium | Ultra |
| Shadow Map Resolution | 1024x (or lower) | 4096x |
| Volumetric Fog | Disabled or Low | Enabled (High Quality) |
| Temporal Upscaling | Enabled (TAU) | Disabled (Native Resolution) |
| Screen-Space Reflections | Disabled | Enabled (High Glossiness) |
| Render Distance | 8 to 12 Chunks | 16+ Chunks |
| Motion Blur | Disabled | Optional (Personal Preference) |
How to Configure the Photon Minecraft Shader How to Install Settings for Max FPS
If you want to maximize your performance after going through the photon minecraft shader how to install steps, open your in-game shader configuration menu (usually accessed by selecting the shader in the list and clicking “Shader Pack Settings”). Try making the following adjustments:
- Enable Temporal Upscaling (TAU): This is the absolute best way to boost your FPS. It lowers the rendering load on your GPU and uses smart temporal reconstruction to keep the game looking sharp.
- Lower Shadow Quality: Soft shadows are beautiful, but rendering high-resolution shadow maps is incredibly demanding. Dropping shadow resolution to 1024x or lower will instantly give you a double-digit frame rate boost.
- Disable Heavy Screen Effects: Turn off motion blur, depth of field, and screen-space reflections. While these add a cinematic feel, they are not necessary for regular survival gameplay and eat up valuable GPU resources.
- Apple Metal Adjustments: If you are playing on a Mac with an Apple Silicon M-series chip (M1, M2, M3), you may experience visual glitches. To fix this, make sure to disable SH Skylight and Colored Shadows in the shader settings.
If your PC is still struggling even after applying these optimizations, you might want to look into mobile-friendly or Bedrock-specific alternatives. Check out our guide on the Best Shaders for MCPE 1.21 2026 Top 3 Realistic Minecraft PE Shaders for pocket-friendly alternatives.
Compatibility with Distant Horizons and Other Mods
One of the most exciting developments in modern Minecraft modding is the Distant Horizons mod. This mod adds simplified Level of Detail (LOD) chunks to the game, allowing you to see miles into the distance (hundreds of chunks away) without melting your computer.
We have fantastic news: Photon Shaders is fully compatible with Distant Horizons!
When paired together, you get breathtaking panoramic vistas with realistic atmosphere, fog, and lighting stretching all the way to the horizon. Photon is also compatible with other popular rendering mods like Voxy (a modern voxel-based LOD mod).
If you are a fan of highly optimized, beautiful environments and want to explore more lightweight visual enhancements, you should also take a look at our Newb X Ambient Shader for Minecraft Ultra Realistic Lighting Smooth FPS Boost 2026 Guide.
Troubleshooting Common Photon Shader Issues
Even with a straightforward installation, things can sometimes go wrong. If you run into issues after completing the photon minecraft shader how to install process, don’t panic! Most common issues have incredibly simple fixes. If you need an in-depth video guide on troubleshooting, check out this tutorial on How to Download & Install Photon Shader in Minecraft 1.21 ….
Resolving Issues After the Photon Minecraft Shader How to Install Process
- The Shader Isn’t Showing in the In-Game Menu: Double-check that you placed the
.ziparchive directly into theshaderpacksfolder. If you extracted the ZIP into a regular folder, Iris/OptiFine might not detect it. Also, make sure you launched Minecraft using the correct Iris or OptiFine profile in your launcher. - You Experience a Black Screen or Heavy Visual Glitches: This is usually caused by outdated graphics card drivers. Make sure you update your GPU drivers to the latest version via Nvidia GeForce Experience, AMD Software: Adrenalin Edition, or Intel Driver & Support Assistant.
- Visual Bugs on macOS (Apple Silicon): As mentioned earlier, Apple’s Metal API handles shaders differently. If you see broken shadows or flashing lights, open your Photon Shader settings and turn off SH Skylight and Colored Shadows.
- Voxel-Based Colored Lighting is Missing: Colored light cast from blocks like redstone torches or stained glass is an advanced feature. It only works if you are using the Iris shader loader and have selected the Ultra profile in the Photon settings menu. OptiFine does not support this feature.
Frequently Asked Questions about Photon Shaders
Do Photon Shaders work on low-end PCs?
Yes! While Photon is a medium-to-high-spec shader pack, it is incredibly scalable. By enabling Temporal Upscaling (TAU), lowering the shadow map resolution, and disabling volumetric fog, you can easily run Photon on mid-range laptops and older desktop PCs while maintaining a stable 60 FPS.
Is Photon Shaders compatible with Minecraft Bedrock Edition?
No. Photon Shaders is built using GLSL code specifically designed for the Java Edition of Minecraft (via Iris or OptiFine). It will not work on Minecraft Bedrock Edition (Windows 10/11, Xbox, PlayStation, Nintendo Switch, or mobile devices).
If you are playing on Bedrock Edition and want high-quality graphics, you should check out our specialized guides:
- Best Render Dragon Shaders for MCPE 1.21 Tested on Real Devices 2026 Guide
- Top 5 Best Realistic Shaders for MCPE
Why are my voxel-based colored lights not working?
Voxel-based colored lighting is an advanced rendering path that is only supported by the Iris shader loader (version 1.5 or higher). If you are using OptiFine, this feature will be completely disabled. Additionally, you must open the Photon Shader settings menu and ensure your shader profile is set to Ultra to enable the voxelization process.
Conclusion
Installing the Photon Shaders pack is one of the quickest and most rewarding ways to upgrade your Minecraft graphics. By following our simple 5-step guide, you can enjoy a beautifully atmospheric, semi-realistic world with dynamic skies, realistic water, and jaw-dropping lighting effects.
Whether you are exploring massive landscapes with Distant Horizons or building cozy bases illuminated by gorgeous colored lighting, Photon delivers a premium visual experience without sacrificing the smooth performance you need for daily survival gameplay.
If you are ready to find even more incredible graphics packs, resource packs, and mods for your game, we invite you to Explore more Minecraft shaders on MCPEUDAY! Happy building!