

Advertisement
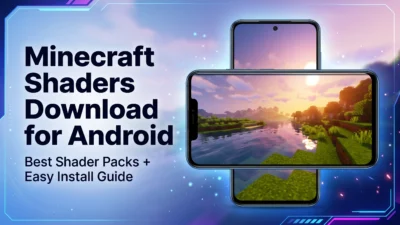
What It Actually Takes to Get Shaders in Minecraft

If you want to know how to get shaders in Minecraft, here’s the short answer:
- Install a shader loader — either Iris Shaders (recommended) or OptiFine
- Download a shader pack (.zip file) from a trusted site like Modrinth or CurseForge
- Place the .zip file in your
.minecraft/shaderpacksfolder — do not unzip it - Launch Minecraft using your Iris or OptiFine profile
- Go to Options > Video Settings > Shader Packs and select your shader
Note: This process applies to Java Edition. Bedrock Edition uses a different method covered further down.
Minecraft’s default visuals are iconic — but they’re also pretty flat. No dynamic shadows. No realistic water. No golden-hour sunlight filtering through the trees.
Shaders change all of that. They add realistic lighting, volumetric fog, waving plants, and water reflections that make the game look almost unrecognizable in the best way.
The catch? Vanilla Minecraft doesn’t support shaders on its own. You need a shader loader, a compatible shader pack, and the right setup for your hardware. It sounds like more work than it is — most players get it done in under 10 minutes.
This guide covers everything: Java and Bedrock, low-end and high-end PCs, and how to fix the most common problems.

What Are Minecraft Shaders and System Requirements
To understand how to get shader in minecraft, it helps to know how they work under the hood. As documented on the Shaders – Minecraft Wiki, shaders are small programs written in GLSL (OpenGL Shading Language) that modify Minecraft’s rendering pipeline.
Instead of drawing flat textures with static light levels, shaders recalculate lighting in real-time. This system is split into two primary components:
- Core Shaders: These render fundamental game elements, including block faces, entities, menus, and inventory screens.
- Post-Processing Shaders: These manage full-screen visual overlays, handling effects like the glowing effect, “Fabulous!” graphics, and specialized mob vision modes.
By upgrading these rendering pipelines, you can experience incredible visual transformations. According to Lenovo’s guide on what are the benefits of using Minecraft shader? | Lenovo India, shaders dramatically enhance your gameplay immersion with realistic water refraction, volumetric clouds, god rays, and swaying leaves.
However, these stunning visuals come with a cost. Shaders are highly GPU-intensive and can reduce your frames per second (FPS) by 30% to 70% depending on the complexity of the pack and your hardware. While vanilla Minecraft relies heavily on your CPU, enabling shaders shifts the heavy lifting to your graphics card. If you are running on integrated graphics, you will need to stick to highly optimized, lightweight packs. To run heavy path-traced shaders smoothly, a powerful dedicated GPU is mandatory.
Here is a quick breakdown of what your system needs to run shaders in 2026:
| Hardware Component | Minimum Requirements (Light Shaders) | Recommended Requirements (High-End/RTX Shaders) |
|---|---|---|
| CPU | Intel Core i5 or AMD Ryzen 5 (or equivalent) | Intel Core i7 / AMD Ryzen 7 or better |
| GPU | Integrated Intel Iris Xe / AMD Radeon Vega | NVIDIA GTX 1660 / RTX 3060 / RX 6600 or higher |
| RAM | 8 GB System RAM (Allocate 4 GB to Minecraft) | 16 GB+ System RAM (Allocate 6-8 GB to Minecraft) |
| OS | Windows 10/11, macOS, or Linux | Windows 10/11 (64-bit) |
| Graphics Drivers | Updated within the last 3-6 months | Latest official NVIDIA, AMD, or Intel Arc drivers |
How to Get Shader in Minecraft: OptiFine vs. Iris
To run shader packs in Java Edition, you must use a third-party shader loader. The two major options in the community are OptiFine and Iris Shaders.
For years, OptiFine was the undisputed king of Minecraft optimization. It is a standalone mod that provides deep custom configuration options, support for connected textures, and legacy shader compatibility. You can read more about its historical configuration options in the official Shaders¶ documentation.
However, in 2026, Iris Shaders has become the modern standard. Iris is an open-source shader loader built specifically to work alongside Sodium, a modern rendering engine that replaces Minecraft’s stock renderer.
Here is why most players now choose Iris over OptiFine:
- Better Performance: Iris + Sodium regularly delivers 5% to 15% higher FPS compared to OptiFine when running the exact same shader pack.
- Mod Compatibility: Iris works flawlessly with modern modloaders like Fabric and Quilt, making it easy to run shaders alongside your favorite modpacks.
- Faster Updates: Iris is updated quickly for new Minecraft releases.
- In-Game Toggles: Iris allows you to enable or disable shaders instantly using a hotkey (usually
K) without reloading the entire world.
Let’s look at how to install shaders using both methods.
How to Get Shader in Minecraft Using Iris and Sodium
This is the fastest, most optimized way to get shaders running on your PC.
- Download the Iris Installer: Go to the official Iris website (
irisshaders.dev) and download the universal installer JAR file. - Install Java: Ensure you have the correct version of Java installed on your computer. Modern versions of Minecraft (such as 1.21 and above) require Java 17 or higher to run mod installers.
- Run the Installer: Double-click the downloaded Iris installer file.
- Configure the Installation:
- Select the “Iris Install” option (this automatically bundles Sodium for maximum performance).
- Choose your desired Minecraft version (e.g., Minecraft 1.21.11 or 26.1.2).
- Click Install.
- Launch the Game: Open the official Minecraft Launcher. In the bottom-left corner, select the newly created Iris & Sodium profile and click Play.
- For a complete visual walkthrough of this modern process, check out this video tutorial on How To Download & Install Shaders for Minecraft 2026 (PC).
How to Get Shader in Minecraft Using OptiFine
If you are playing on older legacy versions, using Forge-based modpacks, or prefer OptiFine’s specific feature set, follow these steps:
- Download OptiFine: Visit the official OptiFine website and download the version that matches your Minecraft game version exactly.
- Run the Installer: Double-click the downloaded
.jarfile to open the OptiFine installer. - Click Install: Ensure the directory points to your default Minecraft installation folder, then click Install.
- Launch Minecraft: Open the Minecraft Launcher, select the OptiFine profile from the installations dropdown, and launch the game.
- For a step-by-step video guide on setting up legacy versions, check out How To Install Minecraft 26.1.2 Shaders on PC.
Step-by-Step Installation Guide for Java and Bedrock
Once you have your shader loader installed, you need to download actual shader packs and place them in the correct directory.
Java Edition Installation Step-by-Step
- Download a Shader Pack: Visit trusted platforms like Modrinth or CurseForge to download your preferred shader pack. It will download as a
.zipfile. Do not extract or unzip this file! - Open the Minecraft Folder:
- Windows: Press
Win + R, type%appdata%\.minecraftand press Enter. - Mac: Open Finder, press
Cmd + Shift + G, type~/Library/Application Support/minecraftand press Enter.
- Windows: Press
- Locate the shaderpacks Folder: Look for a folder named
shaderpacks. If it does not exist, simply right-click, create a new folder, and name it exactlyshaderpacks(all lowercase). - Move the Shader Pack: Drag and drop the downloaded
.zipshader pack directly into this folder.

- Enable the Shader In-Game:
- Launch Minecraft using your Iris or OptiFine profile.
- Navigate to Options > Video Settings > Shader Packs (or Shaders if using OptiFine).
- Click on your downloaded shader pack from the list to highlight it.
- Click Apply or Done.
For more detailed version-specific guides, you can watch How To Install Shaders on Minecraft PC (1.21.11) or How To Download Shaders for Minecraft 26.1.2 – YouTube.
Bedrock Edition (MCPE) Installation Guide
If you play on Bedrock Edition (Windows, Android, iOS, or consoles), you cannot use Java .zip shaders. Since the introduction of the Render Dragon rendering engine in Bedrock version 1.18.30, traditional third-party shader packs are no longer natively supported on most devices.
However, creators have developed specialized material packs designed specifically to work with Render Dragon on real devices. To find verified Bedrock-compatible visual upgrades, check out our curated lists:
- Discover top-tier mobile visual upgrades with the Top 5 Best Realistic Shaders for MCPE.
- Get the latest 1.21 recommendations from the Best Shaders for MCPE 1.21 2026 Top 3 Realistic Minecraft PE Shaders.
- To see how these perform on actual hardware, read our comprehensive Best Render Dragon Shaders for MCPE 1.21 Tested on Real Devices 2026 Guide.
To install these on Bedrock:
- Download a compatible
.mcpackshader file from our resources. - Double-click or open the file on your device. Minecraft Bedrock will launch automatically and import the pack.
- Go to Settings > Global Resources, activate the pack, and load your world!
Frequently Asked Questions about Minecraft Shaders
What are the best shaders for low-end, mid-range, and high-end PCs?
Choosing the right shader pack depends heavily on your hardware capabilities. Running a heavy cinematic shader on integrated graphics will result in a slideshow, while a high-end PC can easily handle path-traced lighting.
If you want a detailed look at the absolute best options available right now, check out our guide on the 3 Best Shaders for Minecraft 1.21 Ultra Realistic Smooth FPS Stunning Graphics.
Here are our top recommendations categorized by hardware level:
1. Low-End PCs & Integrated Graphics
If you are playing on a laptop with integrated graphics or an older desktop, you should look for lightweight, FPS-friendly shaders that focus on clean atmosphere rather than heavy real-time shadows:
- Newb X Ambient: This is an incredibly well-optimized option. Read our performance breakdown in the Newb X Ambient Shader My Honest Test on a Low End PC Real FPS Results Setup Guide.
- Sildur’s Enhanced Default: Keeps the classic look of Minecraft but adds clean, lightweight reflections and colors without tanking your frames.
- Newb X Unwind: Great for keeping gameplay incredibly smooth. Check out the Newb X Unwind Shader for Minecraft Ultra Realistic Graphics Smooth FPS Stunning Visuals.
2. Mid-Range PCs (GTX 1660 / RTX 3050 / RX 6600)
For players with dedicated mid-range graphics cards who want a balance of stunning visuals and a stable 60+ FPS:
- BSL Shaders: The most popular shader pack on CurseForge and Modrinth, offering highly customizable, bright, and clean aesthetics.
- Newb X Sapphire: Excellent mid-range visual styling. Find out more at the Newb X Sapphire Shader for Minecraft PE MCPE Ultra Realistic Graphics FPS Friendly Stunning Visuals.
- Newb X Stars: Specifically optimized for gorgeous, atmospheric skies. Read about it in the Newb X Stars Shader for Minecraft PE MCPE Ultra Realistic Graphics FPS Friendly Stunning Night Sky.
3. High-End PCs (RTX 3070 / RTX 40-Series / RX 7000-Series)
If you have a powerful gaming rig and want maximum visual fidelity:
- Complementary Reimagined / Complementary Shaders: Widely considered the gold standard for modern Minecraft. It features exceptional performance optimization paired with beautiful atmospheric fog and water physics.
- Newb X Dragon: Perfect for ultra-realistic fantasy visual overhauls. Check out the Newb X Dragon Complementary Shader The Ultimate Minecraft Shader for Realistic Graphics.
- Newb X Future: A forward-looking, highly advanced shader pack. Explore the setup details in the Newb X Future Shader for Minecraft Best Realistic Shader for Low End High End Devices.
- SEUS PTGI: A path-traced global illumination shader that brings ray-traced style lighting to standard Minecraft Java Edition.
How do I optimize shader settings to fix low FPS?
If your game is lagging after enabling shaders, you don’t have to turn them off completely. Most shader packs offer extensive in-game configuration menus.

Try these adjustments to recover massive amounts of performance:
- Reduce Shadow Resolution: This is the single most expensive shader feature. Dropping your shadow map resolution from 2048 to 512 can recover 20% to 40% of your FPS with very minimal impact on visual quality during active gameplay.
- Lower Your Render Distance: Shaders multiply the rendering cost of every visible chunk because they calculate lighting passes for each block face. If you normally play at 16 chunks, try lowering your render distance to 10 or 12 chunks when shaders are active.
- Adjust Shader Profiles: Most popular packs (like BSL or Complementary) feature built-in performance presets (Low, Medium, High, Ultra). Drop the preset down one level in the shader options menu.
- Disable Volumetric Fog and Motion Blur: Volumetric fog looks fantastic but is highly demanding. Motion blur is also heavy on performance and is generally disliked by players during survival gameplay.
- Monitor VRAM Usage: If your graphics card runs out of Video RAM (VRAM), your performance will crater. Avoid pairing high-resolution resource packs (128x or higher) with heavy shaders unless you have a GPU with at least 8 GB of VRAM.
Why are my shaders crashing or not showing up in-game?
If you run into issues while installing your shaders, don’t worry. Here are the most common problems and how to fix them quickly:
- The shader pack doesn’t appear in the menu:
- Double-check that you placed the
.zipfile into the correctshaderpacksfolder inside your.minecraftdirectory. - Make sure you did not unzip the file. The shader loader reads the compressed
.zipdirectly. - Confirm that you launched Minecraft using your Iris or OptiFine profile rather than the vanilla game profile.
- Double-check that you placed the
- The game crashes on startup or when enabling shaders:
- This is usually caused by an outdated Java installation or outdated graphics drivers. Update your GPU drivers directly from the official NVIDIA, AMD, or Intel website.
- Make sure your allocated RAM in the Minecraft Launcher is set to at least 4 GB (or 6-8 GB for heavier packs).
- You get a black screen or broken visual artifacts:
- This occurs when a shader pack is incompatible with your specific Minecraft version or graphics hardware. Try downloading a different, updated version of the shader pack or switching from OptiFine to Iris.
Conclusion
Learning how to get shader in minecraft is one of the best ways to breathe new life into your worlds. Whether you choose the modern, ultra-fast combination of Iris and Sodium on Java Edition, or set up Render Dragon material packs on Bedrock, the visual transformation is worth the few minutes of setup.
At MCPEUDAY, we provide an extensive, up-to-date collection of the best graphics upgrades, gameplay mods, and horror addons for both Java and mobile Bedrock players. Ready to completely transform your game’s atmosphere? Explore more Minecraft shaders on our platform today and find the perfect match for your gaming rig!


[…] visual style, understanding this difference is key to customizing your game. Check out our guide on How to Get Shaders in Minecraft to see how custom shader programs can completely overhaul the look of your virtual […]
[…] If you are new to this concept and want to understand the foundational steps, check out our guide on How to Get Shaders in Minecraft. […]
[…] Read our guide on how to get shaders in Minecraft for a complete breakdown of setting up your mod loaders first. […]
[…] Installing custom resource packs on Minecraft Bedrock is much easier than it used to be. Whether you are on Android, iOS, or Windows, you can get Grafika running in just a few minutes. If you want a broader overview of the process first, check out our guide on how to get shaders in Minecraft. […]
[…] you are new to upgrading your pocket world, learning how to get shaders in Minecraft? is the perfect first step to completely transforming your visual experience and enjoying a […]
[…] you are new to this concept, you might want to read our comprehensive guide on How To Get Shaders In Minecraft to understand the basics of Bedrock graphic […]
[…] coloring and soft lighting. If you are still figuring out the basics of shader setups, our guide on How to Get Shaders in Minecraft is an excellent starting point to understand these fundamental […]
[…] When downloading community shaders from third-party sites, always practice safe downloading. Ensure you are using trusted platforms like MCPEUDAY to avoid malware risks or malicious redirects. To learn more about managing these files, read our guide on How to Get Shaders in Minecraft. […]
[…] If you need a broad overview of how to manage these files, check out our comprehensive guide on How to Get Shaders in Minecraft. For official background on how Bedrock resource packs are structured, you can also review the […]
[…] When Mojang introduced RenderDragon, they discontinued official support for old-school, third-party shader resource packs. This change left many players confused and searching for answers on How to Get Shaders in Minecraft. […]
[…] Setting up your shader package doesn’t have to be intimidating. Whether you are using a game engine or configuring your game client, follow our straightforward guide below. For a broader look at shader installation, check out our guide on How to Get Shaders in Minecraft. […]
[…] context of these graphical tools, you can check out our guide on What Are Shaders in Games or learn How to Get Shaders in Minecraft to see how different platforms handle visual […]